Description
Preparations for replacing the veneer
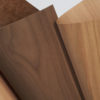
I purchased from Germany a high-quality, untreated American walnut veneer called ”Easiwood“ (http://en.sg-veneers.com/en/products/easiwood.html). I wanted untreated wood which would enable me to apply wood oil and give it the depth of color I preferred (Fig 1). The wood oil is available in various shades of brown. The great advantage of oil-treated wood is that scratches or other stains can be removed very easily. The only disadvantage is that it is necessary to treat the veneer once or twice a year. That is not a big deal if you really love your Riviera! 😉
The oil should be applied before reattaching the frames on the door and rear seat panels.
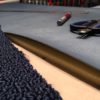
Most veneer is very thin, often less than a millimeter thick, and can split or spall (chip) very quickly when not reinforced. To avoid this, I strengthen the veneer with a very thin aluminum plate (maximum 0.8 mm) cut to fit the trim pieces. Don’t use veneer thicker than one millimeter or you will have massive problems putting the frames back in place. I used the original veneer, which was carefully removed, as a template to cut the aluminum with a sheet shear (Fig 2 & Fig 3). You could also use a jigsaw: just make sure the blade is adequate to saw metal. I cut the veneer a little larger than the aluminum by using a scalpel or X-Acto hobby knife and applied it to the aluminum with a strong contact spray (Fig 4 & Fig 5). Be sure the surfaces are clean and dust free.
I recommend applying pressure on the veneer with weights such as sandbags to let it dry overnight.
The next day you can cut off the excess and cut holes for window controls. Now you can apply the wood oil to obtain the depth of color you desire and let it sit overnight. However, you could avoid these steps by purchasing an aftermarket kit, as they are normally pre-cut and have a reinforced layer on the back.
Reapplying the wood veneer
Whether you cut and prepared your own veneer as I did, or purchased an aftermarket kit, now it’s time to apply the veneer to the trim pieces. It is not witchcraft as long as you pay attention to a few small details and use the correct material for gluing.
As we covered in Part 1, each trim piece was removed from the car and the old veneer was carefully stripped off. It is very important that the trim pieces are completely cleaned of all impurities, glue residue and dust (Fig. 6). During the process of removing the old veneer, residue is always left behind. It must be removed with acetone, strong solvents or sanding (Fig. 7). This is absolutely necessary. If not done, the glue will gradually dissolve from solar radiation or high temperatures. That would be a disaster, making it necessary to remove the veneer for cleaning and repeating the process. It’s best to do everything correctly right from the start!
When applying the glue, be sure you cover every surface as evenly as possible with a spatula or, even better, with a contact spray. Be sure to press the veneer as tightly as possible to ensure that all surfaces, including corners, are attached (Fig 8). I recommend placing weights on it overnight, using sandbags or something similar.
The stylized “R” emblems on the door panels are secured to the panel with three pins. To remove the emblems, sand the solder joints from the back and gently push out. Once the veneer has been glued to the panel and dried, pierce it gently through the holes from the back, enabling the emblems to be replaced correctly (Fig 9). To secure, put a drop of epoxy on each pin, or use solder. To replace the frames around the door and rear seat panels, just reverse the instructions included in Part 1 (Fig 10).


